Wanna Make AI Series #1
Bonjour guys! We thought that as this blog is about telling everything about new intelligent machines so we thought that we should also start to teach you guys from scratch that how you can build your own AI for your own purposes with practicals and obviously with code.
We thought this will be a great thing as many of our readers don't have that knowledge to create their own AI and if interested can make their career in this field.
This series will make you understand the concepts of AI via practice. And if you are someone who is beginner then no worries this series will give you enough overview such that you will understand the concepts of research papers and will be able to even make new discoveries yourself in this field.
So, without wasting any millisecond, lets jump straight into it. Oh, by the way, the important thing, the code for this whole series will be on our Github: Radientbrain
Things we will require to get started
- A laptop with any operating system (for coding) but here we will be using Windows OS [Laptops can preferably be with GPU but not necessary]
- Python language installed in it (Some libraries will also be required which we will tell whenever we require them and how to install them)
- An IDE of your choice [Preferably Anaconda IDE for Windows users]
- Patience and the Zeal to learn
There is also an alternative to get started to write code without using your laptop and that is using Google Colab. Just you need is a google account and head over to here and get started to write your code which will run on GPU for free. Note that you need atleast a working internet connection to work here as we can't work here offline.
So if you have these then lets get started.
Today's Theory #1
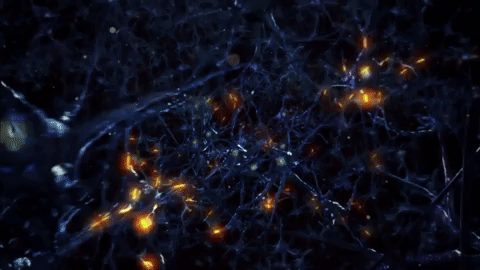
The concept of AI is generally based upon how our brain thinks. Mostly we have mimicked the fundamental part of our brain, the Neuron, to actually start making the AI.
As, the information is passed on to the neurons via a complex structure of neurons which get the inputs from our sensory organs like eyes, nose, ears, skin and tongue. We get output from them in form of the actions we perform via our limbs, mouth, etc.
Similarly the building blocks of any AI(the neurons) act in the similar way. Below you can see a diagram comparison of a Human neuron to AI neuron.
Note: This AI neuron doesn't have a real physical structure and this structure is only for understanding as how a simple neuron takes input and gives the output.
 |
| Human and AI neuron [Source:here] |
Perceptron
Perceptron is a simple algorithm that outputs 1s or 0s depending upon the input vector (lets say "x") of "n" values ( ). These input vectors are known as the features.
In mathematics we show a perceptron as:
Here w is a weight vector and wx is the dot product (  ) and b is the bias. If you recall your elementary math class then you will know that wx+b is a straight line in a plane which can change its position according to the values of w and b.
Note: We use w_transpose in place of w in practice.
Note: A perceptron can't answer ambiguous questions whose answer is a "maybe" but can only answer a "yes"(1) or "no"(0).
So, you must be thinking where is the AI here, so what we do here is we show a bunch of outputs for some inputs to the AI model(a black box) which we will create in a moment and then tell the AI to predict and tune the weights and bias such that we get minimum error. And we always aim for an error closest to Zero and consider that to be what we want.
The Update rule for the weights for each iteration is as follows:
where %20*%20x)
and  is the learning rate between 0 and 1
So, here is an example to make you understand this update step:
Actual Label Predicted Label (Actual - Predicted Label)
1 1 0
1 0 1 (weights are too low)
0 0 0
0 1 -1 (weights are too high)
So, whenever there is a misclassification then the weights are changed and pushed towards the negative and positive target class.
Training our first Linear Perceptron
So, at this point we can infer from the above example that its a type of classification problem which we are dealing with.
Lets take an example, that we want to classify from a SONAR data that whether the object is a NAVAL mine or a rock. This SONAR dataset contains a data of around 208 patterns which are obtained by bouncing SONAR signals off a metal cylinder(the NAVAL mine) and a rock at various angles and under various conditions.
Here, we will also be using some concepts of activation functions and the some techniques like gradient descent, etc. but you need not worry because we will be covering these concepts in the next followup of this series.
So, the dataset for making our model can be downloaded from here (its only 85kB). And the whole code can be found on our Github.
The pipeline for making the AI:
START -> Loading the Dataset -> Declare labels and features -> Encode the dependent variable
then
Dividing into training and testing set
and Repeat [ Train the model -> Reduce Mean Squared Error ] until a good reduced error is found and then Test the model -> END
So, the general workflow of any ml model is show below:
You will get familiar with these when you work upon some problems and this series will also let you explore this workflow.
So, as you have a basic understanding as to how we will have our working pipeline so lets get started to code our first perceptron.
[ Note: There are few things that you might not understand now in the code but just try to go through the code line by line and just read and eventually you will get a brief idea on how the code is written and later in this series that will also be beneficial for your understanding ]
Also, the point to be noted is that I am using Jupyter notebook to write the code because it comes on more handy while dealing with machine learning stuff but its not necessary and you can use what we mentioned earlier or any IDE of your choice.
So, First of all we will import the necessary Libraries:
Note: Here I have used the direct link to the dataset file in the line no. 12 but if you have downloaded the dataset on you device from the previous provided link then just give the path where you have stored the dataset.
Now we will pre-process our dataset
Here, we have stored the column values in the form of arrays into 2 variables (x and y)
Now we encode the labels into 0s and 1s as the computer doesn't understand labels and we will be performing certain math operations so we have to convert those labels (Rock and Mine) into 1s and 0s
Now we perform one hot encoding and store the column values in an array form
After one hot encoding we will split the data into train and test sets. Here, we have used random_state=42 as it is recommended to get the same output for the splitting in multiple runs of our code.
Now we will define some variables to give input in a Tensorflow graph
Here we have set the learning rate to 0.01 and have set the epochs for the training to 10,000.
Basically epochs are the number of times we update our weight values and try to reduce the error.
And we define an empty array to store the error rates for each epochs which we will later use to plot the Epoch v/s Error graph.
Also we will disable the eager execution basically its an imperative, define by run interface where operations are executed immediately as they are called from Python. You can get more info about it here.
Here we initialize all the variables we have defined till now into the model object.
And define some placeholders which are the variables whose values we can define in later stage in our code.
Here, we define our Cost function and the Gradient Descent Optimizer to update the weights in each epoch.
Here, we perform our actual Training
Actually here we feed the weights to the Tensorflow session run and give values to the previous placeholders with the dataset values and feed these too to the Tensorflow session run.
We, also insert the values of error at every epoch to the error array that we defined earlier.
Then we check the Accuracy of our trained model.
And at last, we plot our Epoch v/s Error Graph using the matplotlib library of python
So, like this we make our first perceptron to predict weather there is a Rock or a Mine in the sea.
There are more concepts as to saving the model and using it on with another big dataset but as this is just the starting and we don't want you to get overwhelmed so lets just keep those concepts for the discussion in later parts of this series.
And if you have come this far in the blog then congratulate yourself as many people quit to read and leave when they can't understand many parts.
Just what you need is consistency and practice and you can probably get to such a point where these things will look very simple.
So, what you think of this series? Comment down so that we can get your reviews to make this blog more better and also comment on what we should improve to make the readings more interesting as well.
We will end this post with a quote by a highly influential person:
If something is important enough, even if the odds are against you, you should still do it
-Elon Musk